I want to share a success story, and some things you can try yourself, from a Main Lesson block we finished in the middle of Spring: Botany (part two). I knew I wanted to work with this Main Lesson ‘differently’, so decided on exploring the different plant kingdoms through a process of nature journalling. It was SUCH a success! The children absolutely loved it (as did I!), it allowed for purposeful observation, real-life learning, and an immersion in nature. In fact, it was such a winner, that we’ve continued to do weekly nature journalling one afternoon each week.
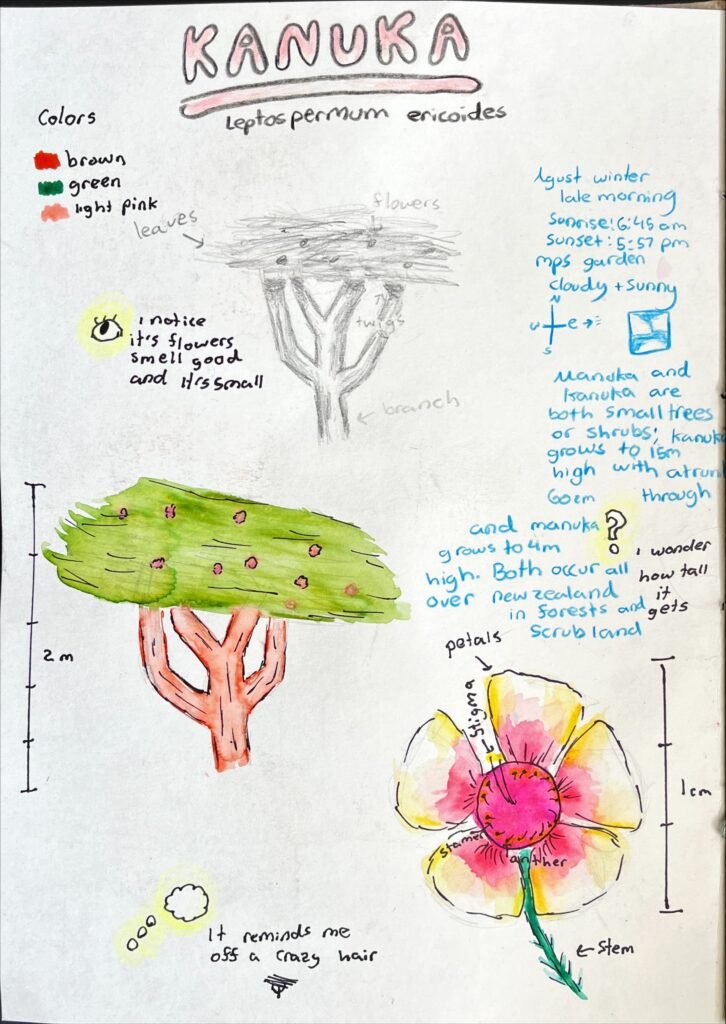
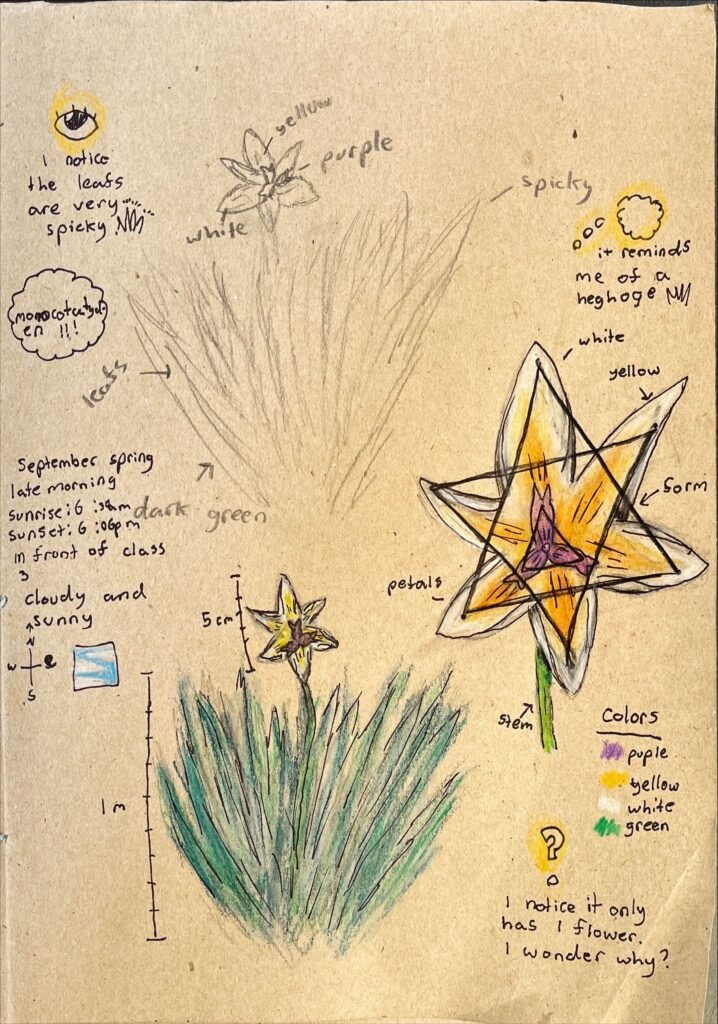
It was a joyful, beautiful, experience for the children, and we have the process down to a fine art. Through a series of sketching and art styles, the children have learned to capture the gesture of a plant, draw an accurate diagrammatic sketch, and finish with a beautiful artistic version.

Over the first two days of the block, I scaffolded in the skills the children needed to explore all the different plant kingdoms through journalling and using field guides for the rest of the block. It’s an easy process to establish with children that then allows them freedom with purposeful structure as they begin journalling independently. If you’ve ever considered nature journalling with your children I’d so encourage you to have a go, and I hope the process here might help as a starting point 🌺
Here are the basic steps for a nature journal page entry that we used:
- Blind contour: look at the plant, don’t look at the paper, and quickly sketch the plant using a pencil WITHOUT looking at the paper and WITHOUT lifting your pencil off the paper
- Modified contour: same as blind, but you can glance at the paper briefly to help you
- Gesture sketch (five): in FIVE seconds, sketch the ‘gesture’ of the plant
- Gesture sketch (ten): same as above, but ten seconds
- Gesture sketch (fifteen): same as above, but fifteen seconds
- Diagrammatic sketch: In about 5 minutes, sketch the plant in as much detail as possible. Label all the things you notice—colour, texture, size, shape, environment…
- Artistic final drawing: lightly sketch then add colour (watercolours, pencils, crayons), then black fineliner to add accurate colour and detail. Use a field guide to find the correct name and attributes to list alongside. Fill in any further relevant information – where, when, weather, senses, etc.
If you work through these steps in a modelled way the first couple of times and leave a display version up as a reference point, the children will quickly get the hang of it and be confident in no time. It is such a wonderful practice, and doesn’t have to be part of a Main Lesson by any means! You could theme it around seasons, animals, birds, flowers, trees, insects… the options are endless.
Keen to try the full process I used yourself? I turned our Main Lesson block into a day-by-day teaching guide (designed to be useable at home or in a classroom, and as a unit study or Main Lesson block) – you can get it over on my Etsy store.
Happy journalling!