First up, can I just say I’m a HUGE fan of the moveable classroom in classes one and two! But taking one step back, what exactly is it? When someone first told me that I was going to be working in a moveable classroom in class one, I had visions of a classroom on wheels! I quickly discovered that the term ‘moveable classroom’ or ‘moving classroom’ is the name given to a set and style of classroom furniture that is designed to be lightweight, flexible, and – you guessed it – moveable. Developed in Europe in the last few years with the intention of getting children up and moving more, integrating senses such as movement and balance, developing spatial awareness, and encouraging flexibility, the moveable classroom has quickly found itself in Steiner classrooms around the world.
I was lucky enough to teach using the moveable classroom system in classes one and two, and along the way worked out some great systems and ways of using it that I wish I could’ve read about before I started. I’ve had several people approach me recently asking to share my experiences and tips for the moveable classroom – so here goes!
What does it look like?

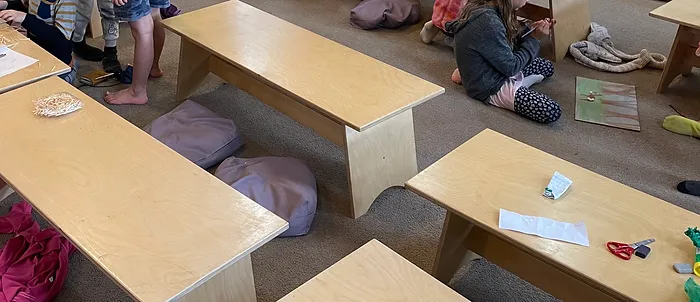
Quite simply, there are two components to the setup: fat, heavy, yoga style cushions, and lightweight wooden benches to seat two to three children. The benches are 1.2m long, 43cm wide, and 40cm high, with a beam running underneath them that connects the two legs. Ideally, this beam is fat enough that when the bench is turned upside down it can be used as a balancing beam.
The cushions should be square, about 34cm x 34cm, and 11cm deep. Ideally, they are a calico liner covered by a sturdy, washable cover. Ours are stuffed with wood flakes – the kind you get for pet cages – so they’re solid and comfortable.
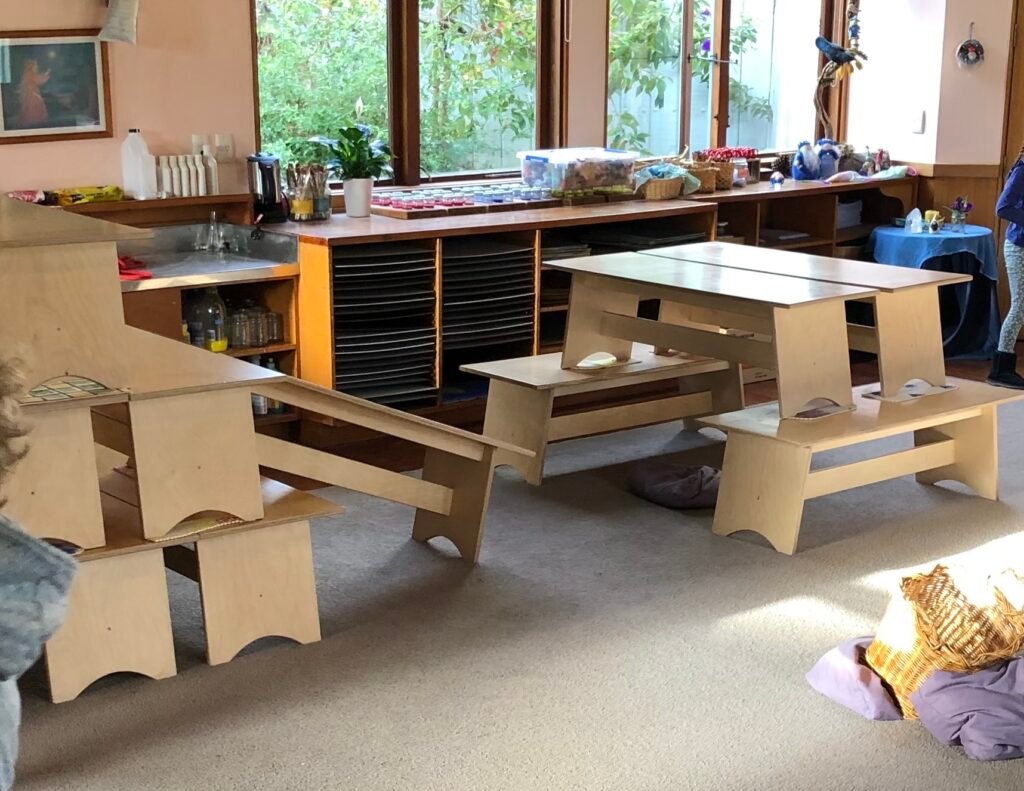
In the photo to the right are the class set of benches stacked for storage, and in the background on the shelf are purple cushions – these are what the students sit on. Wooden cubbies for storing belongings are on the left.
How do you actually use them?
Well, it takes some getting used to, especially if you’ve had individual desks in the past. Like most things in a classroom, to make it easy you’ll need clear, thorough routines and expectations, especially in the beginning. To get a feel for how you’d make them work for a day, let’s walk through an average day in the classroom.
- Children arrive to the benches as they left them the night before – in a circle. Each child knows where their place is in the circle, and on which bench (this is shown on the first day, and a seating plan is on the wall for them to check in case they forget). There are two children per bench (three is okay early in class one when they’re small), and that person is their ‘bench buddy’ – they stay sitting beside them regardless of the positioning of the benches.

- After the morning circle part of the day, the children move their benches into rows for main lesson learning. Here is where you need to have a really solid system, otherwise chaos will ensue! In class one, we had a ‘shaker’ (a maraca percussion instrument). Initially I would shake the shaker, but later I would ask a child to, when it was time to move the benches. I would then hold up my arms to indicate the form we were going to move the benches into – groups, rows, or right out to the edge of the classroom. The gesture for rows was two arms held up in front of me (kind of making an equals sign). The children would simply hear the shaker, look at my arms, and know what to do. Again, on the first day, you need to show each child where they’re moving their bench to. I would always start at the front of the room and move backwards. The children would then need to remember their place, or look at the seating chart on the wall if they forgot. Early in class one we would practice moving the benches three or four times from circle to rows to get the system smooth. Once the benches were in rows, the children on the right hand end of the bench were the ‘cushion collectors’ and would go up the back and get the cushions for themselves and their bench buddy. The other child was the ‘cushion returner’ and at the end of row time would take the cushions back before helping to move the bench. For my class of ~30 students I had four rows of three benches, and one row at the back of four.
- Generally for maths and literacy practice lessons, we’d keep the benches in rows. For things like painting and form drawing, we’d move them into groups. Again, I would shake the shaker, the children would look at my hands, and this time I would hold hands together, kind of in a ‘prayer’ pose. This was the symbol for groups. Bench buddies pick up one end of the bench each, and put it together with the pair either in front or behind, depending on the size of your class. The benches are now side on to the front so all can still see the board if needed.
- Finally, at the end of most days we’d move the benches back to the circle. Cushions are returned by the returner, the shaker is shaken, and my arms were held in a circle. Quickly the benches are moved into a circle, though support is often needed from the teacher to get all the benches fitting in some semblance of a circle.
- However, in class one, one afternoon per week (generally a Thursday), we would use the benches to build an obstacle course which would be done first thing on Friday morning. For this there were no arm gestures, simply guidance and support from the teacher to build safe structures that were also fun. I had a basket of ‘sticky mats’ in my room (simply kitchen drawer liners cut up into 30cm x 20cm pieces) and the rule was that if children were stacking the benches, they had to put a mat under the legs of each bench to stop them sliding. Over the course of the year the class became experts at making towers, tunnels, slides, ramps, and all manner of fantastic obstacles. The images in the slider below are just a couple of the many varied obstacle course designs the class made using the benches.
Final thoughts
The moveable classroom is a system that once you start with it, you’d never go back. It is so different from the setup of a traditional classroom, but so freeing and flexible and imaginative – all that we want for the children we teach! Does it have any drawbacks? The only real challenge I found hard to solve was with a child that really needed his own space and containment. Having to share a bench and work with others was really beyond him in class one. The solution we worked with was that he got a bench to himself, though this still wasn’t ideal as he had to get help to move it. Last year, the class one teacher got our caretaker to chop one of the spare benches in half, creating two individual benches. This was a perfect solution for the children needing a bit more containment.
All in all, if you have the opportunity to use the moveable classroom in your school, go for it! It’s an amazing resource and really forces us as teachers to be flexible and think outside the box. The children love it, and it makes for many entertaining indoor playtimes on days when outside isn’t an option.
The moveable classroom has been so loved at my school that this year we’re trialling a class three version with my class – the tables are different but it’s the same idea. Stay tuned for an update on how that goes!
If you have had experience with the moveable classroom I’d love to know! Share your experiences below or send me an email at hello@waldorfthisway.com. Similarly, if you’ve got questions that I haven’t answered here, or would like to chat more about the moveable classroom, don’t hesitate to reach out.